Google+
Showing posts with label Offense. Show all posts

Wednesday, November 2, 2011

Surface Area II...Plan of Attack

When dealing with Irregularly Shaped boards, it is necessary to consider the areas to attack and how to defend against them.
A Game "In Progress"
Here we have basic Risk style game in progress, using the map of the US as the board.  The states occupied by a player all show the same color.


   Blue = 15 Armies
 Green = 12 Armies
Yellow = 14 Armies
   Red = 9 Armies


For this example we will have the following rules:
  • Every state provides one army per turn, which may be placed in any state(s) the player controls,
  • Every state may only attack states adjacent to them,
  • A player may not 'Blitz' -- launch an attack from a recently captured territory (Example: I capture Colorado this turn, I may not then attack from Colorado this turn, but may do so next turn).
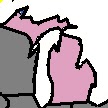
Michigan in Pink
It's all one state
We will look at various sides to determine the best possible moves and how the irregular board affects their decision making.


NOTE: Michigan is oddly shaped and in the main image appears as if it is two separate locations.  However, it is important to realize this location is all one state.
Yellow: On the Offensive

Yellow appears to be in the worst possible position militarily.  Yellow has charged up the center and now occupies 14 regions.  Normally in a game where a player creates a bulge like this it is not a good thing.  Despite receiving 14 armies, Yellow can be attacked into 10 different locations.  Trying to defend all of these locations is nigh impossible, especially considering they may face the might of all three opposing powers.


Yellow needs to consolidate it's power.  The answer is to attack.  The question is "Where?"
Positive Attacks
Positive Attacks
Since the concept is to reduce Yellow's surface area, Yellow should consider attacks into the locations indicated on the right.  The two attacks against Red in the upper left should be made first as they will decrease Yellow's overall surface area from 10 to 9.


When on the offensive, any Reduction in Surface area is a good thing.  Therefore, these attacks are a Positive Attack: an attack the player should definitely make!  The order of the attacks is important.  The northernmost attack should be made first as, by itself, it is a Neutral attack. 


Negative Attacks
Increase Surface Area
Negative Attacks
Attacking any of the states shown in the diagram below will result in Yellow increasing the surface area.  This will result in Yellow spreading its troops even thinner in order to hold on to the state.  Even if Yellow were to win ever battle there would be a net increase in surface area.  Unless a player has overwhelming superiority in force, or there are no other options remaining, negative attacks should be avoided.


Neutral Attack
Neutral Attacks
The attack into Missouri will result in a neither an increase nor a decrease in surface area.  As such, the player may decide to make the attack or choose to wait it out.  Such territories are considered 'Neutral Attacks', as they provide no tangible benefit, but carry no additional risk.


Some games, such as Risk, give a player a bonus if capture a territory.  In the case of Risk, if a player captures one territory during their turn they receive a card.  When matched with other cards the player has collected, the player may trade them in for additional armies.  For many such games, these additional armies become critical to winning the game.  This can shift a Neutral Attack to a Positive Attack.  However, if the player has already captured a territory somewhere else, the benefit (the card) has already been earned.  This once again relegates the attack to being 'Neutral'.


Neutral Attacks should be undertaken only if the player has sufficient force.  It can also be used as a bargaining chip for negotiations with other players.


Conditional Attacks
Conditional Attacks
The two attacks on Red's southern states (Arizona and Utah) normally would yield negative results.  Even if both states were won together they would result in a net increase in surface area.  However, if the two attacks above it are successful (see Positive Attacks above), then winning both states would result in no overall net increase in surface area, but the player would control more states resulting in more armies.


This makes these attacks 'Conditional Attacks'.  Making these attacks is dependent on the outcome of some other attack(s).  They are also dependent upon having sufficient forces available for both attacks to be successful.


Next Article
The next article will discuss what Yellow should do if it is not its turn and is forced to act defensively.

Sunday, October 16, 2011

Hex War Games - Right Unit for the Job

Generally speaking, when attacking or defending, the smartest action involves using the best unit type against the enemy unit.  These are not always clear cut, but the following recommendations make good generalization.

vs. Infantry
Unlike most of the other units, the power of infantry lies on the terrain it occupies.  If in the enemy is in the open, hit infantry with armor, artillery or air units.  In any other terrain, it requires a combination of units to bring infantry down.  This is due to the fact nearly every other terrain allows infantry to sneak behind and get close to the attacking unit, except in Open terrain where there is no cover.  In jungle terrain, infantry are the best unit to use against other infantry units, although mobility becomes difficult.

vs. Armor
When combating armor in open terrain, use artillery, anti-tank guns, and other armor to bring them down.    In the case of anti-tank guns, attempt to provide them concealment to ambush the tanks.  If given notice of where the AT guns are located, armor can either engage the enemy AT guns from a distance or stay out of reach and bypass them.  Even Self-Propelled AT Guns are only good in ambush as they must rotate the entire vehicle to engage the tank.

If armor is in a city or any other terrain type, infantry are by far the best unit.  When in enclosed terrain, such as cities or forests, tanks suffer from many blind spots.  Additionally, infantry can rise up from beneath the belly of the tank (think sewers or mines), or they can fire down from the tops of tall buildings. 

vs. Artillery
Best use against artillery is to get in close and hit it with anything.  Even during the Civil War, when artillery was armed with canister rounds which would shred infantry to pieces, the long reload time of artillery meant if the infantry held together they could usually take the pieces, if the artillery was unsupported.

Otherwise, the best unit to hit Artillery is probably air units or other artillery units.  If there is insufficient Air Defense units, artillery are a sitting duck for aircraft.  Artillery should be at the top of the list of units to destroy.  Without artillery, attacks will eventually falter and defenses will eventually fall.

Artillery does have one very weak spot that, if the game allows for it, should be exploited: the baggage train.  Armor can carry jerrycans of fuel and attacks generally have enough fuel to attack in and, if it falters, flee back.  Infantry can carry days or weeks worth of supplies, plus small infantry units can always "live off the land" if there is sufficient livestock nearby.  And in close in fighting a person with a pitchfork can be as deadly as a man with a pistol.

Artillery, however, must have a constant supply of ammunition to be effective.  Furthermore, the munitions themselves are explosives.  Destroying this "baggage train" of explosives, or even disrupting the supply line for a turn or two, can remove artillery's effectiveness and leaves the artillery canon unscathed for capture.

vs. Air Units
The effectiveness of Air Units will differ depending on the era.  WWI aircraft were effective at spotting for Artillery, tracking enemy movements and possibly attacking ammunition depots.  The ability to track enemy movements was, by itself, enough of a threat to make taking down aircraft an important goal.  One important development in WWI aircraft was the creation of specialized "roles": Fighters, Bombers, Spotters, and Recon.

By WWII aircraft came into their own.  American aircraft were the primary means by which they defeated the Imperial Japanese Navy (IJN).  Strategic Bombing changed the face of warfare, bringing the concept of "total war" to fruition, making every person a subject to the pains of war.

There are two primary defenses against Aircraft: Air Defense Guns (AD, includes Surface to Air Missiles for purposes of this discussion) and other fighter aircraft.  Of the two, fighter aircraft are the most effective at shooting down other fighters in interception-based engagements.  However, AD can be extremely effective in defense of a given point.

This sounds confusing, but basically AD guns are static and can only defend a given area around the gun.  Aircraft have the ability of engaging the incoming enemy at any point in the enemy flight path, as long as the enemy can be identified.  Thus, if defending a given point or unit, such as a supply depot, large numbers of AA units surrounding the area will provide adequate defense.  If the need is to attack high flying bombers out of the range of AD units, other aircraft become a necessity.


vs. Ships
The best units against ships is a submarine.  But against a fleet of ships, I recommend aircraft.  Left to their own devices, the best way to attack a ship is to put a submarine just off the path of the ship.  The submarine simply waits, and then ambushes the ship, remaining silent and hidden the entire time.  The trick becomes predicting what the enemy ship's path will be, as the enemy will zig-zag the course.  Although capable of moving underwater, submarines are to slow to catch even the smallest of ships without surfacing, thereby losing their advantage.

The second best method is with Aircraft, if they are available.  Aircraft can fly high above the target, and attack ships with either bombs or torpedoes.  If in a fleet, aircraft will have to attack en masse, relying on numbers to sink or damage the target.  Once spotted, a single aircraft will have difficulty escaping a fleet of specially armed AA destroyers, and if a carrier is nearby, one can expect a swarm of fighters to flood the area.

If playing prior to the introduction of aircraft or submarines, the best way to engage a ship is with a larger ship.  In the age of sail, positioning or "crossing the T" may make up the difference.  In this case, it is not the larger ship which makes the difference, but the number of canons which can be brought to bear on the enemy ship/fleet at one time.  This is much harder to calculate, and where one must use judgement.

vs. Submarines
Post-WWII, the best anti-submarine weapons is another submarine, preferably an attack submarine.  In a pinch: aircraft, destroyers, and even some cruisers have anti-submarine weaponry.  During diesel age of submarines, the best weapon was the aircraft.  A submarine was force to charge its batteries and much of its "strategic" movement was performed on the surface.  Aircraft were best at ambushing these machines while they were on the surface.  In all those cases, however, their effectiveness depends on number of units, quality of units, and luck.

Oddly, submarines are the best way to sink an enemy submarine, but a fleet of anti-submarine ships is the best way to suppress a submarines.  Place enough anti-submarine ships between the submarine and its desired target, and the submarine may give up.    Once detected, submarines must go defensive, their ability to attack diminishes greatly.    While a single ship attempts to engage the submarine, the fleet slips away.  Aircraft cannot maintain the constant contact and attack runs against submarines like specialized Anti-sub destroyers.

It is necessary to therefore determine the objective when dealing with submarines: is it to sink the submarine, or to protect the fleet.  If the former, it may require multiple ships, at the expense of leaving the fleet insufficiently guarded, and the submarine may still escape.  In the latter, it may take one or two fast destroyers and the fleet or convoy is perfectly safe.  Destroying a submarine may "feel good" to a player, but if it prevents the fleet from arriving on time to save the land troops, consider the victory a defeat.

vs. Cavalry
Cavalry represent a special case.  Cavalry combine elements of submarines and armor.  The best counter against cavalry in a straight up fight is infantry.  A solid infantry square of poorly led troops still  has good odds of defeating a cavalry charge.  This is because cavalry, once removed from their horses, are weak infantry.  Like armor, cavalry units need to engage units in the open, as the forest terrain breaks up the formation too much, while swamps, jungles and mountains will damage the mounts.  Unlike Armor, cavalry can rarely perform true 'breakthrough' attacks independently and wait for infantry reinforcements. Cavalry historically are used to either pin the enemy down until reinforcements arrive, harass the enemy baggage train, or finish off retreating units after they have already been routed.

However, Cavalry can provide fast support where needed.  This requires another quick unit to intercept and engage them before they can provide that support.  In this case, the best unit is another cavalry unit.  However, Cavalry on Cavalry exchanges will result in heavy losses from either other, and it is not always easy to determine which side will suffer.  Often times, simply engaging the cavalry to slow them down is enough to counteract their effects.  Thus, Cavalry can be a 'situation' unit, one which may be incredibly useful if in play, or completely ineffective.

Saturday, May 21, 2011

Hex War Games - Strategy Part XVI - Taking a City

Some lessons one must continually learn.  For me, it is 'how to take a city'.  For some reason, I continually apply defensive tactics when I'm on the offensive, and my poor beaten units reflect that mindset.  In an attempt to ingrain this lesson into my mind, I'm going to shed some light on taking a city.  (Screenshots and images are from weewar.com)

Bad Approach - Blue Unsecured City Capture
Step 1: Approach
Do not conquer if the city is on the "Front lines".  Conquering units do not occupy a city, they spend their time quelling the populace.  In this sense, units conquering a city suffer disadvantages during the conquering process.  In game terms, this manifests itself as a reduction in defense values and an inability to attack.

If the conquering units is one of the initial units on the front lines, it can be expected the conquering unit will be easily defeated.  If enemy artillery lies within range of the city, the conquering unit's destruction is almost certain.

In our example, the blue infantry has moved in without supporting units and attempted a capture.  Red will easily overwhelm and destroy the blue infantry.


Step 2: Red Occupies the City
Step 2: Occupy

Instead of conquering, front line units should occupy the city instead.  The advantage of occupying a city is the unit maintains it's full strength and defensive capabilities.  While occupied, the city remains under the original owner's control, but the city cannot produce units if it is a production game.  This should continue until Step 3 occurs.

In our example, Red has moved into the city, but not set the unit to capture the city.  If attacked by Blue, red will have full defense available to it.

Step 3 & 4: Secured City and Capturing Infantry Unit
Step 3: Secure
Secure the area beyond the city limits with other friendly units.  Use the ZOC of the units to prevent enemy units from attacking the conquering unit.


By moving the Red infantry in the hexes facing the enemy units, the city is now secured.  This red line must first be breached before the blue units may assault the city.

Step 4: Conquer


Move the conquering unit into the city.  This will increase the likelihood of successfully conquering a city and minimize the overall casualty rate.

Failed Blue counter attack.
Red's gambit pays off.  Concentrating their firepower, the blue units eliminated a Red infantry and was able to penetrate the Red line.  However, this single attack was unable to destroy the Red infantry unit in the city.  Next turn the city will revert to Red's control, another victory in Red's plan to dominate the map.


Saturday, May 7, 2011

Hex War Games - Strategy Part XIV - Artillery Use

Artillery suffers from unique weaknesses and strengths.  Artillery requires time to setup, map its exact location, measure wind speed, etc.  The advantage of artillery is it can bombard at a great distance and bring incredible firepower to bear.

In game terms, for most modern games, artillery cannot move and fire at the same time.  Unlike infantry and armor, where it is simply 'commit and go', artillery requires some forethought to use properly.  Additionally, artillery is also expensive compared to other units.  This article will review the use and tactics of artillery.

Artillery Screen
First and foremost, artillery is not capable of surviving without units protecting it.  Infantry or armor can provide adequate screening units.  The idea is to keep the enemy from being able to engage the artillery in close combat.  Use of ZOC to limit movement of enemy units can provide this protection.
Effective and Ineffective Screening of Artillery Unit's by Using ZOC
In some games, artillery has a minimum range at which the unit cannot fire on units.  In this case, the ideal screen forces the enemy units to be kept within the artillery unit's minimum and maximum range.  With artillery support, units can form a more spread out defensive position as the artillery will bring firepower to points of critical contact with the enemy.

Retreat
Unlike other units, which may retreat and advance at will, artillery requires knowledge of when an enemy assault will succeed and when it will peter out.  If an enemy unit or two advances within the artillery unit's minimum range and friendly forces cannot repel them, it is too late.  If the enemy attack would fail or be driven back, or if forces can be diverted to make it so, moving the artillery will waste at least two turns moving if it retreats too early.  This is situational, and requires experience in both the game system and the tactics employed, but the player must decide the right time to move.

Pair Artillery
One artillery piece is powerful, two is devastating.  Unlike other units, with the exception of air units, artillery should always be paired with another artillery piece, preferably two of the same type.  Pairing artillery provides many benefits including:
  • Simplified Logistics,
  • Leapfrogging Movement.
Simplified Logistics
Complex Logistics
In games with logistics, different artillery pieces may require different supply chains.  In these games, units with the same types of artillery may utilize the same logistics chain.  This means rather than protecting two independent logistics, a single chain may be protected.  In game terms, this means if a player has X units available to defend the logistics chain, all X may be used to protect the chain.  Alternately, if needed, some of the X units may be moved to the front line, replacing damaged or destroyed units and maintaining momentum at minimum loss to effectiveness.
Simplified Logistics
 Leapfrogging
A major disadvantage of artillery is the inability to move and fire in most games.  Using paired artillery, it is possible to maintain constant fire on enemy units.  This is done by using one unit to attack while the other moves, thus the term 'Leapfrogging'.  
Leapfrogging Artillery

Leapfrogging can be used during an attack or a retreat.  When used in attack, artillery helps to maintain momentum of the attack.  Many times an attack will eventually lose steam, usually as the attacking units become damaged or destroyed.  At the beginning of an assault, artillery is within range and bombards the enemy units, minimizing casualties.  As the units advance, they outrun their artillery support, and the front line units become less effective faster, and become damaged/disabled.

Soon the assault pauses as the player must move weakened units out of line, reinforcements must move into their place, and the artillery moves forward to support position.  All of this gives the opponent time to reorganize and launch a counter attack against these weakened units which now lack artillery support.  Leapfrogging artillery helps maintain a constant stream of firepower to assist where needed.

In retreat, leapfrogging artillery assures the attacking units receive constant damage.  The concept here is to force the opponent to lose important units at critical junctures.  The loss of a single enemy unit can swing the tide of battle by shrinking the line of attack, exposing a flank, or breaking the attack in two.

Saturday, April 30, 2011

Hex War Games - Strategy Part XIII - Furthest Back First

With all things being equal, players should begin their turn moving and attacking with the unit furthest away from a conflict first.  This is not always possible, but it should be the first consideration.  Why?  Because it provides more options and better reactions to the upcoming battles.  This is particularly effective in Unit-By-Unit games.

The Situation
The attacking units are A and B, the defending units are 1 and 2, as shown in the diagram below.  

Initial Position
 The following rules apply:

  • Every unit may move up to 3 hexes and make 1 attack
  • An attack may be 50% successful
  • A successful attack destroys the defending unit
  • Every unit has an ZOC which stops movement (Interrupting ZOC)
From the initial position provided, the attacking player may move either unit A or unit B first.  These two options examined in detail below.

Moving A First
If Unit A moves first, the following diagram shows the end position of the units.
Unit A Moves First
Regardless of whether the Defender at position 1 is destroyed by Unit A's attack, the furthest positioning Unit B can travel is the hex shown due to movement limitations.  If Unit A's attack is unsuccessful, unit B may attack Unit 1.  Thus, Defender 1 has a 75% chance of being destroyed at the end of the combat round.  However, Unit B has a 50% chance of making an attack at the end of its movement, only if Unit A's attack is unsuccessful.

The Attackers could do much Better.

Move B First
If Unit B moves first, Unit B may attack Defender 1 at 50/50 odds.  There are two possibilities here, Unit B is successful or unsuccessful in the attack.  In a worst case scenario for the attacker, Unit B's attack is unsuccessful.  In this case, Unit A may then move into position and attack as shown in the diagram below:

Unit B Moves First But Attack Unsuccessful
This diagram looks like the one before it, except in this case both Unit A and B make an attack.  The odds of Unit 1 being destroyed haven't changed, 75%.

However, this configuration will only occur 50% of the time.

Move B First - Attack Successful
The real advantage here is if Unit B's attack is successful.  In this case, Unit A may now move adjacent to Unit 2 and make an attack against it.  In this case, there is a 50% chance Unit 2 will also be destroyed.  The diagram for this position appears below:
Unit B's Successful Attack
Final Analysis
The following table summarizes the results of the combat odds based on if unit A or unit B is moved first:
Move
First    
Defending Unit
12
A75%0%
B75%25%
Odds of Defender Being Destroyed

From this example, by moving Unit B first the attacker gains significant options tactically.  By moving Unit A first, the attacker removes these options.

There are times when this advice may be ignored, usually due to tactical considerations.  Perhaps there is a counter attack capability of Unit 2 which Unit 1 does not have?  Are there enemy units capable of attacking Unit B next turn if it advance too far?  It remains up to the player to decide if the tactical issues outweigh which unit should move first.  But generally, the player's first instinct should involve moving and attacking with the unit furthest back first.

Saturday, April 23, 2011

Hex War Games - Strategy Part XII - Know the Units

Offensive Advice -- Finally!
Given the feedback I've received, I should probably make the title larger and italicize it.  However, this article may not cover the 'tactics' everyone is interested in, but again, we must start with the basics.

Know the Units
Knowing the individual units is critical to any form of offense and defense.  In some games, there is little to no difference.  For example, in the game 'Here I Stand', all units are effectively the same based on type.  All Naval Units have the same value, all ground units have the same characteristics.  Only the Ottomans have any different 'types' of units with their Cavalry and Pirate ships.  This does reflect the organizational units of the time.

For most games, units exhibit significant differences.  Regardless of era, these can usually be categorized in the following way:

Infantry - Infantry form the basic unit of every army.  Infantry perform nearly every task equally well, except for naval actions.  Infantry can hold a position defensively, and are expected to assault enemy positions with equal vigor.  Normally, the basic infantry are better at defending a position than attacking a position and so in infantry 'Quantity beats quality' tends to exist.

Armor - Armor units represent units with heavier armament and usually take more effort to bring down.  In modern usage, armored units consist of tanks, self propelled anti-tank guns, and armored personnel carriers.  However, I would argue armor has always existed.  In ancient times Chariots could be considered armor.  During medieval times, Heavy Knights would constitute as armored units.  When looking at ancient Greek city-states, the Greek Heavy Infantry (Phalanx)  could be considered armored units.

Armor units usually do well in offense and not so well on defense.  Usually armored units must travel in larger groups for safety, and so they don't do well where terrain would force the units to space out too much.  Forests, Mountains, and Broken Terrain are anti-thesis to armored units.

Cavalry - Cavalry units perform the role of recon, scout, and follow up after an attack.  Cavalry rarely engages in fights until the battle is over, or nearly over.  Cavalry units tend to move fast and perform 'hit and run' tactics.  Left on their own, cavalry forces will fall to any other unit quickly if it is a sustained operation.  This makes cavalry effective as an attacking force, but not in a 'head-to-head' way.  Cavalry should strike behind enemy lines, at the baggage train or supply lines of the enemy.  They move faster than other units and should strike quickly.  Cavalry can operate over most terrain types effectively.

A common misconception is 'units on horses = calvary unit'.  Heavy Knights often lack the long term speed and endurance necessary for cavalry.  They may execute a 'cavalry charge', but that does not make them cavalry.

Sappers/Engineers - Sappers, or Engineers, perform very specialized roles.  Their combat ability is often rudimentary, if not worse, than common units.  However, they make up for it by having better fortifications or being able to assault fortified positions.  In game terms, these units often have superior attack and defense values than other units in the game.  Sappers require extensive training and specialized equipment to perform their job.  Sappers/Engineers usually fortify a position, or prepare the assault on a position, and then other units perform the defense/assault.  In proper use, Sappers/Engineers will be committed to a battle only after all other units have failed and success hinges on sheer numbers.

Skirmisher Units - Skirmishers, at their most basic, are slower moving cavalry.  They move quicker than the main body of infantry, but are not as strong in either attack or defense as other units.  Skirmishers operate best in difficult terrain and over longer distances.  Skirmishers don't 'hold the line' but 'extend the line'.  A common use for Skirmishing units is to fill in the defensive gaps of the main units.  However, this is not how they are designed to be used.  Skirmishers should harass the enemy from the sides, provide flanking attack bonuses for other units, or exploit a newly created hole and attack unguarded artillery.

Archers/Snipers (Ranged) - Archer units are units with exceptional attack range which are not armored.  Archer units are often weak up front, but their power is to support the main units, bringing fire to bear from a distance.  In the case of modern warfare, where every unit carries guns, the Archer can be considered 'snipers'.  Snipers typically can shoot from much further away than their rifle armed comrades, and with great accuracy.  There is a fine line between Archers and Artillery units, usually depending on the era.  In Ancient times, bowman may be considered as Artillery, whereas in medieval times bowman would be Archers and canon fill the role of artillery

Artillery - Artillery units are another unit I would argue have always existed.  The primary duty of Artillery is to fire from a distance on enemy units.  Later uses for Artillery include the ability to assault, or soften, fortifications.

Traditionally, artillery units affect large areas of space over a long distances, and are weak, or useless, in a close fight.  In some ways, ancient bowman fit this bill as they were used to rain down arrows over an area from a distance.  English Longbowman could be considered an artillery unit of its time, although they also performed the Sniper role.

Siege - Siege units perform the roles necessary to assault enemy fortifications.  Many other types of units may perform the siege role, including artillery and sappers.  Regardless, siege units are required for the taking of fortified objectives.  Catapults, Trebuchets, explosive barrels, and towers are all forms of siege weapons.  Siege units need extra protection from attack.  Even Sappers, which may be a good fighting force normally, usually require extra protection when they constructing tunnels (sapping) under the enemy walls.

Naval - Naval units move on, or under, the water.  That seems pretty basic, but usually naval units are critical to a war plan either as fire support or to protect the supply lines.  Naval units come in many types, but often they perform the same role as an equivalent ground unit (ex: Battleships = artillery, destroyers = Cavalry, etc.)

Air - Air units move through the air.  Like naval units, they may perform other roles (helicopters = cavalry, bombers = artillery/siege, etc.).  There are two major distinctions with Air units, however.  First, Air units normally require a base to which they must return, whereas naval units can remain at sea for extended periods of time.  Secondly, Air units are very responsive and have an incredible reach.  Terrain does not affect movement of Air units, although weather might.  However, Weather affects ground, sea, and air units.

Submarines form an interesting blend of naval and sea units.  Submarines travel beneath the waves, much as aircraft travel above them.  Submarines can remain at sea for extended periods of time, unlike aircraft.  Submarines perform the duty of skirmishers and sniper.  Unlike other units, submarines rely on stealth and the ability to slink away unseen.  They are the only unit which may be completely bypassed without incident, moving unseen to strike without warning.

Saturday, April 16, 2011

Hex War Games - Strategy Part XI - Why Study Defense?

I've received several emails asking to start talking about offense.  A few comments from emails received include (I will not reveal who emailed them, and spelling mistakes are included):
  • 'Why study defense, offense is where it is at?'
  • 'Come on!  Get to the Offense!'
  • 'Enought with the Defense, get to the good stuff.'
  • 'Defense is booooorrrrinnnnggg!'
First, thanks for all the feedback, emails and comments.  I enjoy hearing from everyone, so please keep it up.  Second, starting next week we will begin studying the basics of Offense, but I'm taking this time to describe why understanding Defense is so critical.

Defense: The Universal Constant
Defense is the one aspect of combat all sides of a conflict are involved in, even the attacker.  The reason being not every unit can attack at all times.  A player who constantly attacks without repair and refit results in understrength units that cannot maintain the impetus for battle.  Even attackers must, at some point in time, stop to gather their forces together at a common location.  During this time, the attacking units are vulnerable unless they can effectively defend themselves.  So everyone, even the side which was the 'attacker' must go defensive at some point in time.

Defense Wins Wars, Offense Wins Battles
In long, drawn out affairs, it is possible to achieve a Pyrrhic Victory, a victory in the battlefield which eventually leads to the destruction of the war.  Indeed, the term "Pyrrhic Victory' comes from the King Pyrrhus of Epirus when fighting the Romans during the Pyrrhic Wars (c. 280 BC).  After two battles in which King Pyrrhus attacked and defeated the Romans, he had insufficient men to continue on, and this led to not only to the defeat of his nation, but to the conquering by Rome of all of Italy and Greece.1


But what of more modern cases of Defense winning wars and Offense Winning Battles?  In WWI the Germans attacked brilliantly with the Ludendorf offensive in 1918.   Their offensive operations tore through the countryside and defeated the enemy.  Unfortunately for the Germans, their units overextended their supply lines and they had to come to a halt.  By the time they were ready to renew the offensive, the Americans had arrived with over 250,000 fresh troops and the French had time to prepare a trap for the Germans.  When the German assault began again, the Germans were disastrously defeated.  In the first phase, the Germans lost near 230,000 casualties, in the renewed offensive they lost 3 times that number.2


Understanding Defense Leads to Better Offense

If, in the process of gaming, you develop 'The Ultimate Defense', simply wait.  Eventually someone will come along and ask you to play 'the other side' in the game and use your own Ultimate Defense against you.  Knowing the Ultimate Defense and how it works, you should have a better idea how to defeat it.  Of course, once your opponent sees how to defeat it, she will use that against you in the next game.  And so 'The Ultimate Defense' will need to evolve.


The key here is understanding how the defense works leads to better ways to counter it.  Warfare, like game play, evolves.  Only by playing and understanding both (or all) sides in a conflict does game play improve.


I remember often playing as the Warsaw Pact forces in a game called FEBA (now Tac Air).  The game was horribly unbalanced in terms of units.  NATO Forces were virtually undefeatable even when outnumbered 3 to 1.  Placing two NATO armored units next to each other created an impregnable wall and so my opponent always chose that option.  The key, as I learned, was to pick a sacrificial unit of mine and use its ZOC to force the NATO units to either separate or engage that single unit.  If separated, I would then overwhelm first one unit then the other.  If they came after the sacrificial unit, the rest of my army would bypass them, leaving the unit to its doom, but continuing the advance to the objective.  Only by understanding the defense could I shape my strategy to overcome it. 


Conclusion


I hope this explains the importance associated with understanding defense.  If looking for 'better offensive tactics to win', I recommend reviewing the defensive blog entries again and indepth.  Understanding how the defense works, its limitations, and why the opponent moves units into a particular place will better assist in determining how to defeat it.


With that, I promise the next blog entry will begin covering Offensive Operations.


References
I recommend researching the above battles at the local library.  Given the propensity of the web, I suggest reading the sites if library research is not desired.
1: http://www.unrv.com/empire/pyrrhic-war.php
2: Ludendorf Offensive